Friday, March 28, 2014

A Finish! Snowballs During the Winter that Won't End

This quilt is for little Olivia who is only 2 1/2 months old, and since it still feels like winter outside I think she'll have time to use this it before warm weather comes.  Whew!  She hasn't outgrown it before I finished it.  I'm new to this gramma thing and haven't got my timing down yet.

I'm still working on taking photographs that show the true colors....

Below, after a spin in the washer.

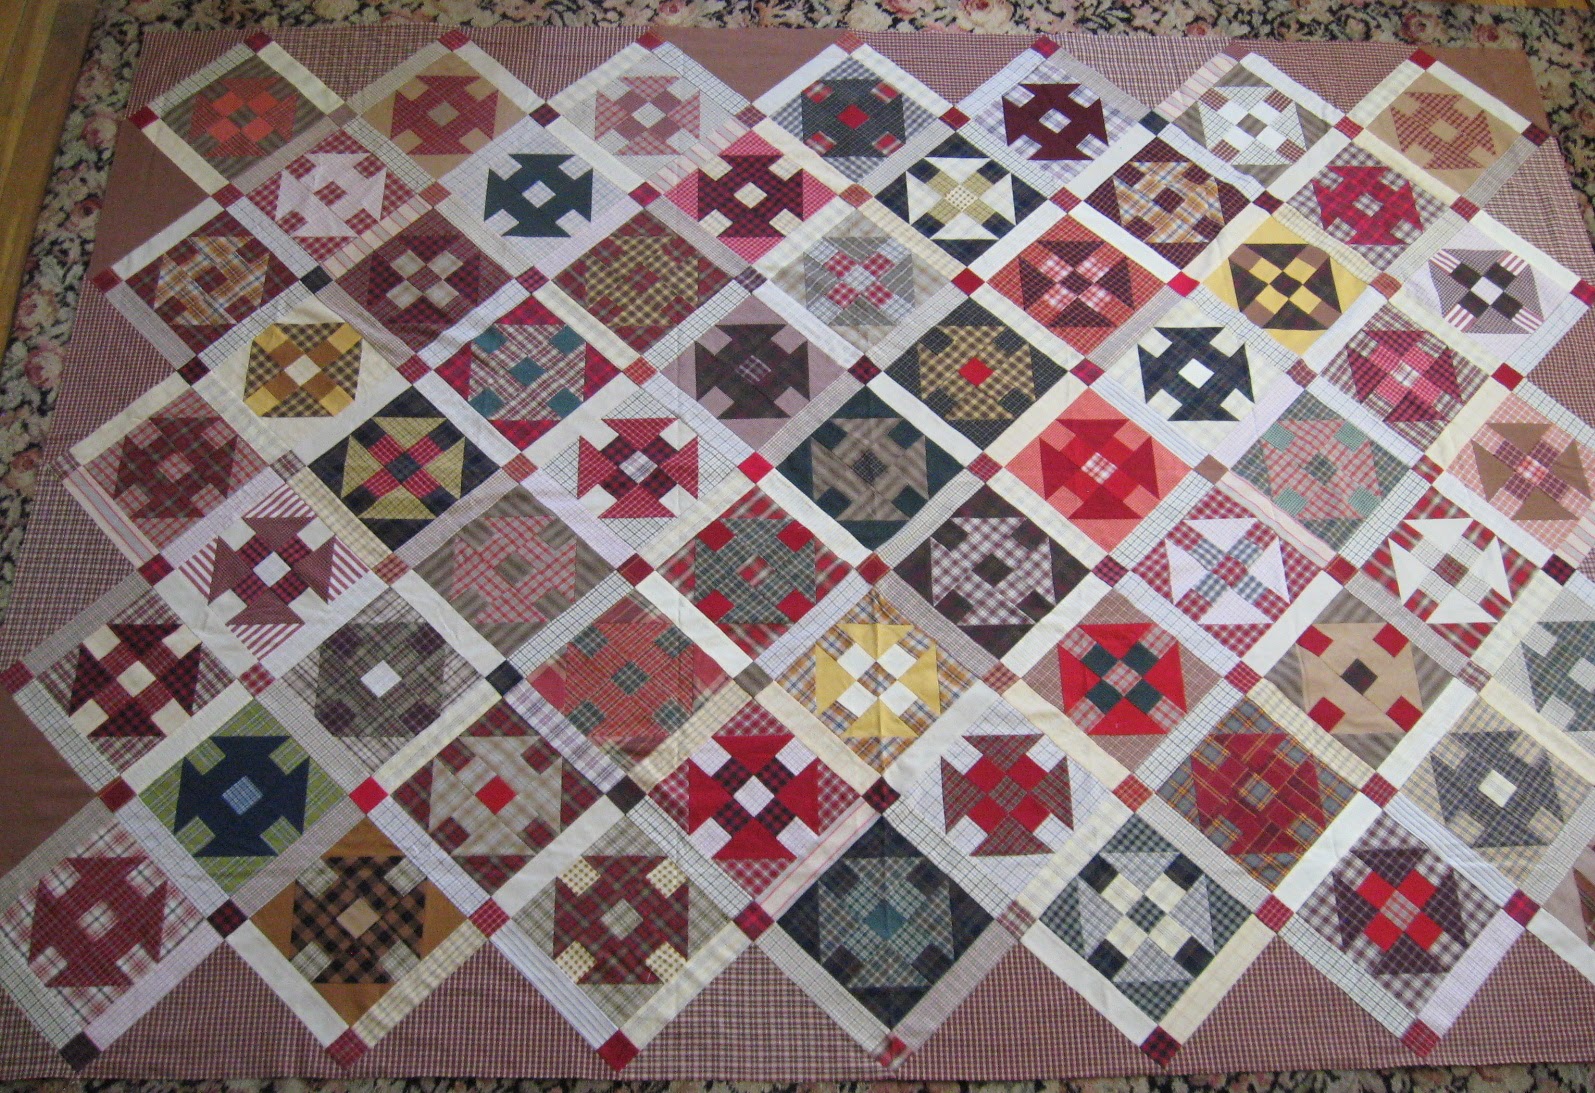
The finished quilt measures 41 1/8" x 52 1/8". 

I like to record details of each quilt I finish. 

Timeline  I record dates when part of the quilt was finished but not necessarily why it took so long.  Four months to quilt this little quilt is an impossibly long time except that I spent two weeks at my daughter's home before and after the baby was born helping her and watching new baby's toddler-brother.
10/14/13 - begun
10/26/13 - center blocks sewn together
11/13/13 - borders sewn on and applique finished
11/16/13 - quilting begun
 3/15/14 - quilting finished
 3/18/14 - binding cut, machine stitched
 3/20/14 - binding finished

Batting (info from package)
Soft n Crafty 80/20 (cotton/poly) from JoAnn
3/16" loft
2"-4" quilting distance
2-3% shrinkage

I found this batting easy to quilt through and I like the loft after washing -- puffed but not too much.  (After all, this quilt's meant to keep my grandbaby warm and it's the loft that adds warmth.  I might make another choice for a different quilt with a different perpson.)

Quilting
Hand-quilted using Natural Essential 100% cotton thread from Connecting Threads. 

Measurements
43" x 55" before layering
42 1/4" x 53" after quilting and before binding
42 5/8" x 53 1/2" after binding
41 1/8" x 52 1/8" after 6 washings and once in the dryer (because of the the pencil)

Actual shrinkage was about 9%.  Whew!!!  Much higher than the suggested 2-3% on the package.


I hope it will keep Olivia warm and comfy the rest of this winter and next year, too.


I'm linking this post to
TGIFF (Thank Goodness It's Finished Friday) at Devoted Quilter, Can I Get a Whoop Whoop at Confessions of a Fabric Addict, and finish it up Friday at Crazy Mom Quilts.   Thanks, ladies.


Happy Quilting,
--Nancy.

Thursday, March 27, 2014

Shrinkage Calculator

Do you ever find yourself in need of a shrinkage calculator?  I like to keep track of how much my quilts shrink from the time I begin them until they're washed and dried.  Oh, yeh, I can do it with a calculator, but I found this online one that's so easy to use.  I thought you might be interested.

Below is a screenshot. 
Go to Wazoodle Shrinkage Calculator to use the real one.

May your quilts shrink little!
--Nancy.
.

Tuesday, March 25, 2014

Why, oh why?

I really want to see beautiful green outside, just as if it were spring blooming forth this moment.   Instead, this was our view this afternoon.

With Edna T. Helberg, I ask,

               Why oh why does it take so long?
               I'm sure the calendar can't be wrong.
               Sunshine fills my heart with cheer.
               I wish that spring were really here.

Maybe tomorrow... or next week... or next month?

--Nancy.
.

Monday, March 24, 2014

Novice Quilt, New Eyes

The reason I shouldn't leave a quilt top too long between finishing it and layering and quilting it is this:  I notice all the problems and begin to reevaluate and reconsider.  If I think too long I'll have the whole quilt taken apart and redone. 

I see more obviously the side setting triangles and ...

... corner triangles that don't line up.

On the shortest pieces at the seams there is not a quarter inch to be sewn.  If I pretend there's no problem and sew the edges, the corners of some squares will be cut off.  I'm debating with myself whether to rip out and restitch those seams or chalk them up to inexperience and consider them "character."

This is the first quilt I set on-point -- made about 7 or so years ago.  Somehow, I think this will be a bear to quilt.  Even so, I'm eager to get it layered (though I still have to choose a backing) so I can have something to quilt.  I'm at loose ends with nothing to do with my hands when I'm sitting talking to my husband or watching TV.


Do you ever look at your earlier, unquilted tops and decide to make changes to them?

I'm linking this post to WOW = WIPs on Wednesday at Esther's Blog and to W.i.P. Wednesday at Freshly Pieced.  Thank you, ladies, for hosting.


Happy quilting!
--Nancy.


P.S.  I'm just remembering that this quilt was inspired by a series of quilts by Nadi Lane called "She Did the Best She Could."  Maybe (maybe?) I should just take the title as a lesson and leave the quilt alone.  Maybe she had a challenge with the triangles, too. 
.

Saturday, March 22, 2014

I Implore You, for the Sake of Your Quilt

On Thursday afternoon I was feeling excited about the ta-da moment of posting my washed and dried snowball and nine-patch quilt for little Olivia.  I'd finished the binding early in the day and tossed the quilt in the washer.  When I pulled it out and examined it I found that the pencil marks for the quilting had not washed out!  Drat!

I was disappointed.  I used pencil on my String-X quilt and it washed out completely.  And I'd sampled pencil on some of the fabrics in this quilt and they washed out.  I know nothing about the chemistry of pencil on fabric.  Maybe some fabrics soak in the graphite, or maybe the longer the pencil is on the fabric, the harder it is to remove.  It doesn't matter.  I would just rather not have pencil lead on a finished quilt.

Being the sensible sort, I did not panic.  I got online and searched how to remove pencil marks from fabric.  I found many suggestions.  I tried each then washed the quilt and air-dried it before trying the next.  Unfortunately none of them were completely effective. 

I tried
  • Goop.  It is my go-to stain remover and nearly never fails me.  Chances are it would probably remove pencil from jeans (where it matters much less than it matters on a new baby quilt!).
  • a white eraser.  That was a big mistake.  It rubbed the fiber the wrong way.
  • liquid hand soap which had no effect whatsoever.
  • a mixture of water, alcohol, and dish soap as recommended at Quilt History.  It was ineffective.
  • Fels Naphtha rubbed on the marks.  It had no effect.
  • ammonia.  This may have lightened some of the pencil lines but did not remove the darkest of them.
  • Lestoil.  This may also have lightened some of the lines but also did not remove the darkest of them.
Lestoil was my last resort.  I used a q-tip to dab it onto the pencil lines, washed it, then into the dryer.  While the pencil lines are still there, the puckers in the fabric around the quilting seem to camouflage all but the very worst of the lines.  I've decided it's a fact that pencil is nearly impossible to remove from fabric.  I can only take comfort in knowing that my great-grandmother's quilt, made in the 1920s or 1930s, also has residual pencil marks and it is no less beautiful nor serviceable than if they were not there.

Still, I implore you for the sake of your quilt,
Please do not use pencil to mark quilting lines!

And one last photo, just for the fun of it.  The view into my washer after the last wash.
 --Nancy.
.

Thursday, March 20, 2014

Maybe On Point?


On point looks fun but I think it's harder to quilt because of the bias.  But it's a possibility.

--Nancy.
.

Wednesday, March 19, 2014

Will I, Won't I?

I'm almost finished with these blocks.  My goal was 30 and I have 28 sewn.  I have 6 yet in progress.  When I'm making a scrap quilt I always like to make a few extra blocks to trade out if some don't just quite "fit" visually.

These are made from both old and new fabric, solids, prints, stripes, plaids.  Such a variety.  I love mixing old and new.

Now that the blocks are almost finished I'm thinking more earnestly about the other details.

Will I or won't I
-- use an arbitrary layout?
-- organize the layout by light/dark or some other way?
-- use wide or narrow sashing?
-- make stars in the sashing?
-- set them straight or on point?
-- be overly cautious and take the safe route with sashing?
-- be bold with sashing by using stripes or a completely different color?

I'm linking this post 
W.i.P. Wednesday at Freshly Pieced and
WOW at Esther's Blog.

--Nancy.
.


Tuesday, March 18, 2014

Do the Corners...

... have to be square?

This corner is off by about one 16th of an inch.  Some of the others were off more.  Strangely enough, they all started out square before I began quilting.  The more I try to square one, the worse the others seem to become.  What is that all about, anyway?  How does it happen?  Maybe because fabric is so moveable?

Wouldn't it be great to have a huge--really huge--cutting mat?  Big enough to cover a pool table.

Wouldn't it be great if there were some magical way to square the corners after the quilting is finished?

I finished the quilting on Olivia's quilt on Saturday.  I hope to add the binding tomorrow and finish it.  She's only (only!) 2 months and a week old.  I'm not too late for her to use it.

Happy quilting!

--Nancy.
.

Sunday, March 2, 2014

More Snow

This photo is a view from one of our upstairs back windows.  It was taken almost exactly a year ago.  It looks almost exactly like I could have taken it today!  Can we really have had so much snow in March two years in a row?

With Edna T. Helberg I say....

               Why oh why does it take so long?
               I'm sure the calendar can't be wrong.
               Sunshine fills my heart with cheer.
               I wish that spring were really here.

It's not literal sunshine that fills my heart - it's the hope of real sunshine!  I know we have another 3 weeks until spring is officially here but wouldn't it be nice if spring were already ushering winter toward the door?

I hope you're staying safe and warm.

--Nancy.
.

Related Posts Plugin for WordPress, Blogger...