Showing posts with label Stars on Scrappy Backgrounds. Show all posts
Friday, May 20, 2016
There It Is, A Finished Top
I have an unexpected finish today. My husband and I usually do errands on Fridays but he suggested we wait till tomorrow. That left me with the afternoon to do what I would have done tomorrow: measure, cut, and sew the brown binding onto this stars quilt. So, it's done.
Mostly, the border lies flat. In the photo above you can see three little ripples in the brown border on the lower right. I don't know what's caused them and I don't know whether they're enough of a problem that I should handle them now or leave them and they'll ease in with hand quilting. I'll leave the top on the floor for a day or two and decide. I can't remember if I've ever had a top with slight ripples or not.
The brown borders are 4" on the sides and 3" on the top and bottom. The center of this quilt is rather long and narrow and I thought wider borders on the side would help (though I know it's just 2" difference). As it is now, it measures 71 1/2" x 92 1/4". I have a post in the works about quilt measurements and proportions so I'll save my thoughts on this quilt and that topic for later.
I'm pleased it's finished. I think I loved the stars and scrappy backgrounds more than I like the finished quilt, but then it's not really finished until it's quilted. As with most quilts I make I see things that could have been done differently to improve the quilt (especially the borders in this quilt) but I'm chalking it all up to learning.
This finish meets my May One Monthly Goal (OMG) for participation in OMG It's Finished! Linkup May 2016 at Red Letter Quilts and my #BraveQuilter challenge at Pink Doxies for May.
I'm also linking this post to
Finish it up Friday at Crazy Mom Quilts
Can I Get a Whoop Whoop? at Confessions of a Fabric Addict
TGIFF at Quilt Matters
--Nancy.
.
Saturday, May 14, 2016
Oh, Sew Carefully!
I so bravely and carefully sewed the colored strips together, aligning them just so, stitching straight, even seams
and it looks like they've become four straight borders! Sometimes I surprise myself.
On to measuring and sewing them to the edges of the quilt on Monday.
Happy sewing to you!
--Nancy.
.
and it looks like they've become four straight borders! Sometimes I surprise myself.
On to measuring and sewing them to the edges of the quilt on Monday.
Happy sewing to you!
--Nancy.
.
Friday, May 6, 2016
One Monthly Goal and #BraveQuilter for May
I could choose finishing the hand quilting on the border blocks of this quilt for May's One Monthly Goal (OMG). With the center finished, I have only the outer half blocks to quilt and, at that, one long side is nearly finished. But because it will be fairly easy to just keep going with this quilt, I thought I'd choose a goal that's a bit more challenging for May.
So, my One Monthly Goal (OMG) for May is to add two borders to this quilt, below. That will be challenging, mostly because borders and I have to work hard to cooperate. (I've made only one quilt with more than one border.)
Not only am I claiming this as my OMG, I'm also going to be a #BraveQuilter this month. The idea is to set a goal to accomplish something that is challenging to you or that you haven't tried before.
I'm dragging my feet with the borders on this quilt. One of these borders will have many small pieces. Can I get make them into a long, straight strip and then pin and sew the strip so it doesn't havve waves around the edge? The other challenge will be color placement on that middle border. I always aim for perfect but sometimes (well, to be honest,often nearly always) I have to settle for the best I can do. Truly, there probably isn't one perfect placement for all the colors in that border, anyway.
I am sometimes tempted to take the easy way, the safe way, in a creative effort (one border and be done) but I remind myself that by doing challenging things I learn something in the process. Always learning is a good thing.
I'm linking this post to
OMG: May Goalsetting! at Red Letter Quilts and
Brave Quilter May Linky at Pink Doxies.
--Nancy.
.
So, my One Monthly Goal (OMG) for May is to add two borders to this quilt, below. That will be challenging, mostly because borders and I have to work hard to cooperate. (I've made only one quilt with more than one border.)
Not only am I claiming this as my OMG, I'm also going to be a #BraveQuilter this month. The idea is to set a goal to accomplish something that is challenging to you or that you haven't tried before.
I'm dragging my feet with the borders on this quilt. One of these borders will have many small pieces. Can I get make them into a long, straight strip and then pin and sew the strip so it doesn't havve waves around the edge? The other challenge will be color placement on that middle border. I always aim for perfect but sometimes (well, to be honest,
I am sometimes tempted to take the easy way, the safe way, in a creative effort (one border and be done) but I remind myself that by doing challenging things I learn something in the process. Always learning is a good thing.
I'm linking this post to
OMG: May Goalsetting! at Red Letter Quilts and
Brave Quilter May Linky at Pink Doxies.
--Nancy.
.
Wednesday, May 4, 2016
Closer to a Decision (I think)
I added the narrow tan border around these stars with brown sashing, sure I would want it there before adding anything else to the edges of this quilt. It seems to set off and separate the center from whatever's going to happen around the edge.
I laid out colors from the stars in border fashion and looked at those for a few days as I passed into and out of the room. (Do any of you think "circus" when you look at these fabrics around the edges?)
For me, it's not really good enough to lay out fabrics like this -- fat quarters folded to look like I think I may want them -- when in the end I would probably use shorter pieces of fabric. But I can't make myself cut up yardage or even a fat quarter when I know I may not use it or may want a different size in the end. I have enough scraps already.
Next I added a scrappy light border alongside the strips of colors.
I think in my mind I'd always intended to use the light scraps to create a border, repeating the effect of the scrappy blocks behind the stars. But somehow it doesn't satisfy.
This morning I took away the light scraps and tried a brown border beside the colors (imagining shorter strips of color).
Hmm. Is this is the kind of quilt I think could go either way -- light border or brown border? After living with the other options for a few days each, maybe brown is best.
I'm not ready to cut and stitch yet. I need to let it rest and look at it for a day or two before I decide. (And if I'm choosing this for my One Monthly Goal, I really do need to decide in the next few days.) But I think I'm closer to a decision.
I'm linking this post to Linky Tuesday Party, Design Wall, WOW at Esther's Blog, Let's Bee Social #123, and Oh Scrap!. Thanks for hosting, ladies.
And that you, readers, for visiting.
--Nancy.
.
Monday, April 25, 2016
Everything's Going Slowly Except Time
I don't know what it is but I'm not making quick progress with anything these days. And yet time just speeds by. The end of the day comes and I wonder where the time went and how I managed to accomplish so little.
One thing I have been making progress with is hand quilting these blocks.
Finishing the whole blocks and the sashing between them is my one monthly goal for April. I'm almost there. I have the rest of this block to quilt plus several sashing pieces and then I'll be done--with the center blocks.
I used to breathe a sigh of relief when I finished quilting the center section of a quilt, thinking that I really was very nearly done because I only had the edges to do. I've learned that the outer border can take almost as much time as half the center did. I don't think my one monthly goal for May will be finishing all 20 half-blocks around the edge of this quilt. (Because time is going too fast.)
These blocks
have become mostly leaders/enders (sometimes of themselves). Unfortunately I'm not sewing another quilt at the moment so there's not much leading and ending happening.
And lastly, I've been playing with the borders of this quilt.
I have no idea where it's going or what it will end up looking like. I don't think I've ever made a quilt that I knew in advance what it would look like at the end. If I were a musician I'd say I play by ear. I don't know what quilters call it when they make decisions as they go along.
The only thing I've decided for sure about this quilt is that I'm adding a narrow, 1" tan border. (You see a 1 1/2" strip of fabric in the photo.)
I cut border fabric on Saturday, trying to match the lines as I cut and sewed the strips together. Mostly I succeeded. Maybe I can work a little faster and get the border stitched tomorrow. More on this quilt later.
I'm linking this post to
Oh Scrap! at Quilting is more fun than Housework
Design Wall Monday at Patchwork Times
Moving It Forward Monday at Em's Scrapbag
Monday Making at Love Laugh Quilt
Main Crush Monday #17 at Cooking Up Quilts
Thanks for hosting, ladies. And thanks to you readers. I appreciate that you took the time to visit.
--Nancy.
.
Tuesday, April 12, 2016
When One Quilt Depends on Another
I made the background for these star blocks from the light scraps in the basket. Scraps just pile up until I have to do something with them.
Sort, or pull out all of one color or several colors from the basket -- choose a block, and begin a quilt. (My scraps are not yet organized by color. It's on my to do list.)
When I cut out behind the appliqued stars I had more scraps already sewn together into about 4" squares. So I squared them and sewed them together with 3/4" sashing and tiny 3/4" center squares.
I continued making more and now have 23. But then I thought I might want to use those light scraps to make a border for the star quilt. So I quit sewing the leftover scrap blocks until I knew whether they would work for a border. This is when progress on one quilt depends on another quilt.
Yesterday I laid the light scraps around the quilt, considering how they would look as a border. It's not enough for me to imagine, and sometimes it's not even enough to see with the naked eye. Sometimes I see things better in a photograph. This time, just waiting till the next morning for a second look was enough; and the photograph added confirmation.
Now that I know I won't be using those scraps for the star border, I can make more of these blocks.
Sometimes, when I look at these blocks hanging together the thought of an old-fashioned window frame with small panes of glass comes to mind. It's too soon to tell how these will go together.
I'm linking this post to blogs below and thank the ladies who host these link-ups.
Thanks for visiting.
--Nancy.
.
Sort, or pull out all of one color or several colors from the basket -- choose a block, and begin a quilt. (My scraps are not yet organized by color. It's on my to do list.)
When I cut out behind the appliqued stars I had more scraps already sewn together into about 4" squares. So I squared them and sewed them together with 3/4" sashing and tiny 3/4" center squares.
I continued making more and now have 23. But then I thought I might want to use those light scraps to make a border for the star quilt. So I quit sewing the leftover scrap blocks until I knew whether they would work for a border. This is when progress on one quilt depends on another quilt.
Yesterday I laid the light scraps around the quilt, considering how they would look as a border. It's not enough for me to imagine, and sometimes it's not even enough to see with the naked eye. Sometimes I see things better in a photograph. This time, just waiting till the next morning for a second look was enough; and the photograph added confirmation.
Now that I know I won't be using those scraps for the star border, I can make more of these blocks.
Sometimes, when I look at these blocks hanging together the thought of an old-fashioned window frame with small panes of glass comes to mind. It's too soon to tell how these will go together.
I'm linking this post to blogs below and thank the ladies who host these link-ups.
- Scraptastic Tuesday at Mrs Sew and Sow
- Oh Scrap! at Quilting Is more fun than Housework
- I May [KNOW I] Have a Scrap Problem - Ready for April at Confessions of a Fabric Addict
- To-Do Tuesday 4-12/16 at Stitch All the Things
- Linky Tuesday at Freemotion by the River
- Building Blocks Tuesday at Quilter in the Closet
- Sew Cute Tuesday at Blossom Heart Quilts
Thanks for visiting.
--Nancy.
.
Thursday, March 31, 2016
Oh My Gosh, My March One Monthly Goal Is Finished
Everything takes me longer than I think it will. (Maybe that's the way things go for many introverts. Or maybe it's just me....) At the beginning of the month I thought I had things under control for choosing sashing for this quilt and that it would sew up quickly in an afternoon. About two weeks into the month, when I began to look closely, I realized that what I thought I was going to do wasn't what the quilt wanted.
When I should have been at least half-finished I was beginning all over again. I finally chose brown for the sashing and a red/rust for the cornerstones. I cut the sashing and cornerstones, no problem, and I thought stitching would take an afternoon. Hah! As I said, things take longer than I think they will. And then, as usually happens, partway through stitching the top together I wondered if I'd made a bad choice for the sashing color and again questioned the arrangement of blocks. I'm satisfied with the sashing and cornerstones.
My lesson with this goal is not to set a time limit on a creative decision. I really can't rush creativity. I need time to imagine possibilities, play with options, and let the quilt speak. (Maybe it's another introvert thing.)
Above is a flash photo taken inside. The colors are just a tad too bright. Below is a photo taken between rainbursts today when the clouds thinned out just a little. The colors appear greyed and less warm than they really are. (But this quilt will have other opportunities to be photographed.)
Despite the problems I mentioned yesterday and despite how it looks in the photo above, the quilt did turn out very close to square -- an attribute I always aim for because it means my piecing and stitching are becoming more accurate.
As it is now, the top measures 59" x 82". I think it needs a border. I've had several ideas but need to play and dream a bit before deciding.
Even without the border, I've accomplished my One Monthly Goal for March: to sew the star blocks together with sashing.
Please visit OMG: It's Finished! Prizes added to March Linkup! at Red Letter Quilts to see other quilters' finishes for March.
I'm also linking this post to
> Can I Get a Whoop Whoop? at Confessions of a Fabric Addict
> finish it up Friday at Crazy Mom Quilts
Thanks for visiting.
--Nancy.
.
Wednesday, March 30, 2016
Coddling a Quilt
I know several of you readers said you liked the red sashing but I finally decided that the stripes I thought I would use were just too busy. I searched for other reds but didn't find fabric I liked enough to use.
I chose brown sashing with red/rust corner stones. I like it, I love it, I don't like it, I'm not sure. But then it's still a work in progress.
I've had to coddle this quilt to as I sew it. I stitched the first two rows together, then had to rip, repin, and stitch again. Even with pins the fabric shifted but I finally managed to get the seams sewn evenly. I laid the first two rows on the floor. They were wavy. I realized that hand appliqueing had caused the accurately-cut 10 1/2" blocks to shift and stretch a little. I didn't want to re-cut them because I assume that they will nestle back to their rightful shape with a little coaxing and pressing (coddling!). I have one more row of stars and the top row of sashing to sew and then it will be finished -- at least finished enough to claim it as a finish for my One Monthly Goal (OMG) for March.
And here is my basket of (never-ending) light scraps with a few 4 1/2" blocks on the left. I have enough of those to make 6 more blocks. I haven't spent much time on them lately. You can see the blocks these will become here.
Thanks to the ladies who host the following link-ups:
> WOW: Cherry Delight! at Esther's Blog
> Let's Bee Social #118 at Sew Fresh Quilts
> Oh Scrap! at Quilting is more fun than Housework
Happy stitching to you!
--Nancy.
.
Thursday, March 10, 2016
Red, or Brown, or . . . .
All along I thought the color I would use for sashing for these star blocks was red. Specifically, these two red striped fabrics with the stripes going cross-ways between the blocks. (They're not all laid out that way below because the fabric isn't cut.)
I like the reds well enough but I had the impression that the quilt wanted either something more or some other color.
I placed some blocks against a mix of browns. Hmmm. Brown adds a different kind of warmth. My husband likes the red because it's brighter but brighter isn't necessarily better. I like the darkest brown on the far right. But for the whole quilt? Will I like it when it's finished? Will I like it for years and years?
These blocks are laying on the floor in a room where I pass frequently enough that I can look in and catch them unawares, surprise myself to see what my first reaction is, so to speak. I need to add some corner blocks as I did with the red, above.
How do you choose sashing colors and widths?
I'm linking this post to
> Oh Scrap! at Quilting is more fun than Housework
> Design Board Monday 25 at Bits 'n Bobs
> Moving It Forward Monday at Em's Scrap Bag
> Monday Making at Love Laugh Quilt
> Main Crush Monday #11 at Cooking Up Quilts
> Design Wall Monday at Patchwork Times
Thanks for visiting.
--Nancy.
.
Thursday, March 3, 2016
One Monthly Goal (OMG) for March, 2016
This month I'm setting three smaller goals combined into one, all to be accomplished by the end of March.
Goal 1. Decide on the placement of blocks.
Goal 2. Decide on sashing, cornerstone, and border fabrics and width.
From the beginning I thought I would use these two red striped fabrics. They are not the same but I don't have enough of either to do all the sashing. One fabric leans toward rust, the other just slightly toward rose/maroon. The differences don't seem to show up too much in the photo so maybe they would work together. I'm all for scrappy, you know. But maybe a different color (or several colors) would be better for the sashing. Brown, putty, rust, black, charcoal/brown.... And the cornerstones won't be circles. I just laid the circles there to give an idea of colors at the corners. One color/fabric, or many for the cornerstones? Lots to consider and decide.
Goal 3. Sew the top together!
March is a longer month and I'm a slow decision-maker so maybe everything will work together and I can accomplish this goal.
I'm linking this post to
One Monthly Goal (OMG) at Red Letter Quilts. Thanks for hosting, Heidi.
--Nancy.
.
Friday, February 26, 2016
February's One Monthly Goal Accomplished
Don't you love it when you can accomplish a goal, especially by a self-imposed deadline?! I do. This was an interim goal, one step toward a completely finished quilt. But I do like to set smaller goals along the way to a grander finish. I'll celebrate big when the quilt is bound, washed, and dried. But for now, I'm pleased to have finished this smaller goal along the way to that bigger goal.
At the beginning of the month I wasn't sure I could finish appliqueing 72 circles onto 36 blocks by the end of the month, slow stitcher that I am. But by last Friday they were all stitched down--a goal met with a week to spare!
I love the look of all 36 layers of those creamy neutrals together.
Now I'm thinking about the next goal for these blocks and this quilt.
I'm linking this post to OMG: It's Finished Party! February 2016 at Red Letter Quilts. Thanks for organizing and hosting One Monthly Goal this year, Heidi.
--Nancy.
.
Wednesday, February 17, 2016
Stars with Circles + Hand Quilting
After sewing the circles on this star I have just four more stars to finish. Getting all those stars sewn was my One Monthly Goal for February. I won't claim it an accomplished goal yet, though. Anything can happen in 12 days!
Assuming that things go smoothly, when the circles are finished it's on to decide arrangement (5 x 7 blocks or 6 x 6 blocks or...), placement, and then sashing and borders.
This work in progress (or non-progress) has been on my mind lately. It's been gently folded in a bag near where I quilt awaiting my return to it.
I laid it aside because I needed something small to work on after surgery last November and also because I'm not thrilled to be quilting a quarter of an inch from the edges. I can't decide if it's because quilting that way is new to me or because I really don't like it. You know how sometimes the unfamiliar is also uncomfortable until you gain experience.... When I was thinking about the quilt in bed last night I thought of taking out the stitches I've finished and quilting Baptist Fans. And then I looked at a photo (poor and not shown here) that showed of the quilting and I liked it again. Is it enough to like the finished work to put one's self through the struggle of doing it when one doesn't like doing it? Ha! The quilting has been a work in progress for a few months; another week or two won't hurt while I decide.
I'm linking this post to
-- WOW at Esther's Blog
-- Let's Bee Social #112 at Sew Fresh Quilts
-- Midweek Makers at Quilt Fabrication
Head over to all three blogs to see what others are working on.
I hope you're enjoying whatever you're doing.
--Nancy.
.
Wednesday, February 10, 2016
Applique Repair
Cutting a hole in the front of an already-appliqued piece of fabric isn't a disaster (at least not on the scale of an earthquake, tornado, or hurricane) but it felt like a catastrophe to me. It was the first time I'd done it. (You can see the hole in this post.)
I repaired the hole and here's the finished block. As one of my readers commented, a scrappy pieced circle works with the scrappy pieced backround.
I cut the original center circle from the last small scrap I had of that checked fabric, just trimming the corners off to use it. For the repair I chose fabric as similar to the original as I could find from fabric on my shelves. The repair itself is decently okay, and it wasn't really too hard to accomplish. I'm especially grateful I didn't have to replace the whole circle with no fabric behind to support it except for a 1/4" edge.
That block was part of my progress (then regress, then progress) this week. The rest of my progress includes some of the blocks below.
My cumulative total of stitched blocks is 20 but I can't remember how many I've done this month. I think I started the month with a few already stitched.
I have 16 blocks that still need circles stitched onto them. (One is missing from the photo below: it's in progress in another room and missed the photo shoot.)
I'm still moving the circles around a bit. The colors look different depending on the light -- morning, afternoon, night, sunny day, cloudy day, etc.
I think I'm on track to finish these circles by the end of the month (barring any catastrophes).
I'm linking this post to
> WOW (WIPs on Wednesday) at Esther's Blog
> Let's Bee Social #111 at Sew Fresh Quilts
Thank you Esther and Lorna.
--Nancy.
.
Monday, February 8, 2016
Oh, No! An Applique Mistake!
I always think I am being so careful when I cut the back of applique blocks. But somehow, this morning -- the first time ever --
I cut through the rust-colored fabric into checked fabric of the top circle! The rust fabric behind the circle is completely cut away. I was trimming inside the circle a little more.
Now what? I searched the internet but didn't find any information about fixing a mistake like this.
Can I patch it? Can I unstitch part of the plaid circle, sew a straight seam to add fabric, trim it, and re-stitch?
I doubt I will be able to unstitch the whole circle, replace it, AND have it come out looking remotely round. I don't have the experience or ability (yet, if ever) to do it.
Will I need to begin again, from the background fabric up?
I stitched the rust circle yesterday while watching Downton Abbey. I stitched (and cut the hole in) the checked fabric this morning.
This is what it looked like before I cut the slice out of it.
Have you ever had a problem like this? If so, how did you resolve it?
I'm linking this post to Slow Sunday Stitching at Kathy's Quilts and Oh Scrap! at Quilting is more fun than Housework. Thanks, ladies.
I hope you're making progress (and not regress, as I am) with your quilting endeavors!
--Nancy.
.
Monday, February 1, 2016
One Monthly Goal for February, 2016
One Monthly Goal. Just one--for a definite finish in February. It might kill me. (I'm such an exceedingly slow stitcher.) I might have to watch a movie (or two) every day to finish. I might . . . . But Wait! It's good to push myself, right?
My One Monthly Goal for February is to finish sewing the circles on these stars. As of February 1, there are 65 circles to be sewn onto 33 stars. With only 29 days in the month, it means I have to sew more than two circles per day! Ouch. But barring all emergencies or difficulties or challenges, I should be able to do it. (I only wish sewing circles were as much fun as sewing the stars has been.)
I'm linking this post to OMG: One Monthly Goal Linkup - Time for February Goals! at Red Letter Quilts. Thanks for hosting the link-up, Heidi.
Nancy.
.
Sunday, January 31, 2016
Circles on Star
For Slow Sunday Stitching I'll be attaching these circles.
I'll work on a second block if I finish this one.
I'm linking to Slow Sunday Stitching at Kathy's Quilts. Today she wrote about staying the course when making a quilt. It's so much easier for me when I love the quilt I'm working on -- the blocks, the fabric, the colors, etc. When I'm hesitant or not completely committed to what I'm doing, it's easier to lay it aside. Sometimes I make sample blocks and can't quite commit to making more. Those are easy to lay aside. And I have a few quilt tops that I finished that I either don't love or marginally like. Those are left in the stack when it comes time to choose the next quilt to finish.
Moving from one project to another is so much more interesting for blog readers, though. There's always something new and interesting to see when quilt bloggers move between projects.
Unfortunately for you, my dear readers, I'm staying the course with these star blocks -- at least for now. It might be agonizing for you readers to see so many variations on the theme of stars on scrappy backgrounds. Perhaps it will take more endurance for you than for me to finish this quilt. Thank you for reading!
Thanks to Kathy for hosting Slow Sunday Stitching.
--Nancy.
.
Friday, January 29, 2016
No Peacocks but One Squirrely Fabric
I devoted several hours today to playing with circles on stars. I was trying to avoid peacocks -- stars that are too bright or showy or draw attention to themselves above any other block. Some blocks have more contrast but I don't think I have any "show-offs." Do you see any? (Because I'm not using Lighbox, you can click on any of the images to enlarge them in a new tab to see more detail, then click again to enlarge again.)
Every star is a different color but I notice that red seems to want to dominate as the layers are added. I've begun to sew circles but I know I'll keep looking and evaluating as I sew and change as I go along. That's a wonderful thing about applique.
There 36 blocks. The challenge is deciding whether to set them 5 by 7 blocks, 6 by 6 blocks, or whether to make more stars so I can set them 6 by 7 blocks. Using 2" sashing and a 4" border all the way around, the 5 by 7 set will finish at about 71" x 94". Set 6 by 6 it will finish at about 82" square. I'm not hugely in favor of square quilts but 94" (with blocks set 5 by 7) seems on the long side for a twin quilt. On the other hand, a 6 by 7 block setting will finish at about 82" x 94", about queen size. Hmmm. (Yes, one other option is to set them 5 x 6 blocks and have it finish at about 62" x 82".)
This is the squirrely fabric. What color would you say it is?
I think it looks green until it sits near true green. It looks a little gold, a little coppery, maybe even a little like army green, but no one color exactly. I like the challenge of unusual colors but this one just doesn't seem to want to work or play with any of the colors.
At the end of today I had these arrangements.
I suspect this one will get changed tomorrow.
Of course, none of the circles are sewn yet. I'm sure some will get rearranged tomorrow.
These circles in stars make me think of wool penny rugs.
I'm linking this post to Oh Scrap! at Quilting is more fun than Housework. Thanks, Cynthia!
Happy quilting to you!
--Nancy.
.
Monday, January 25, 2016
The Sun! And Stars
The joyful news today is that the sun made a bright appearance (for a change)! The big storm that hit the eastern states bypassed our area. But even so, sunny winter days are rare in Central Ohio. It was beautiful. And energizing.
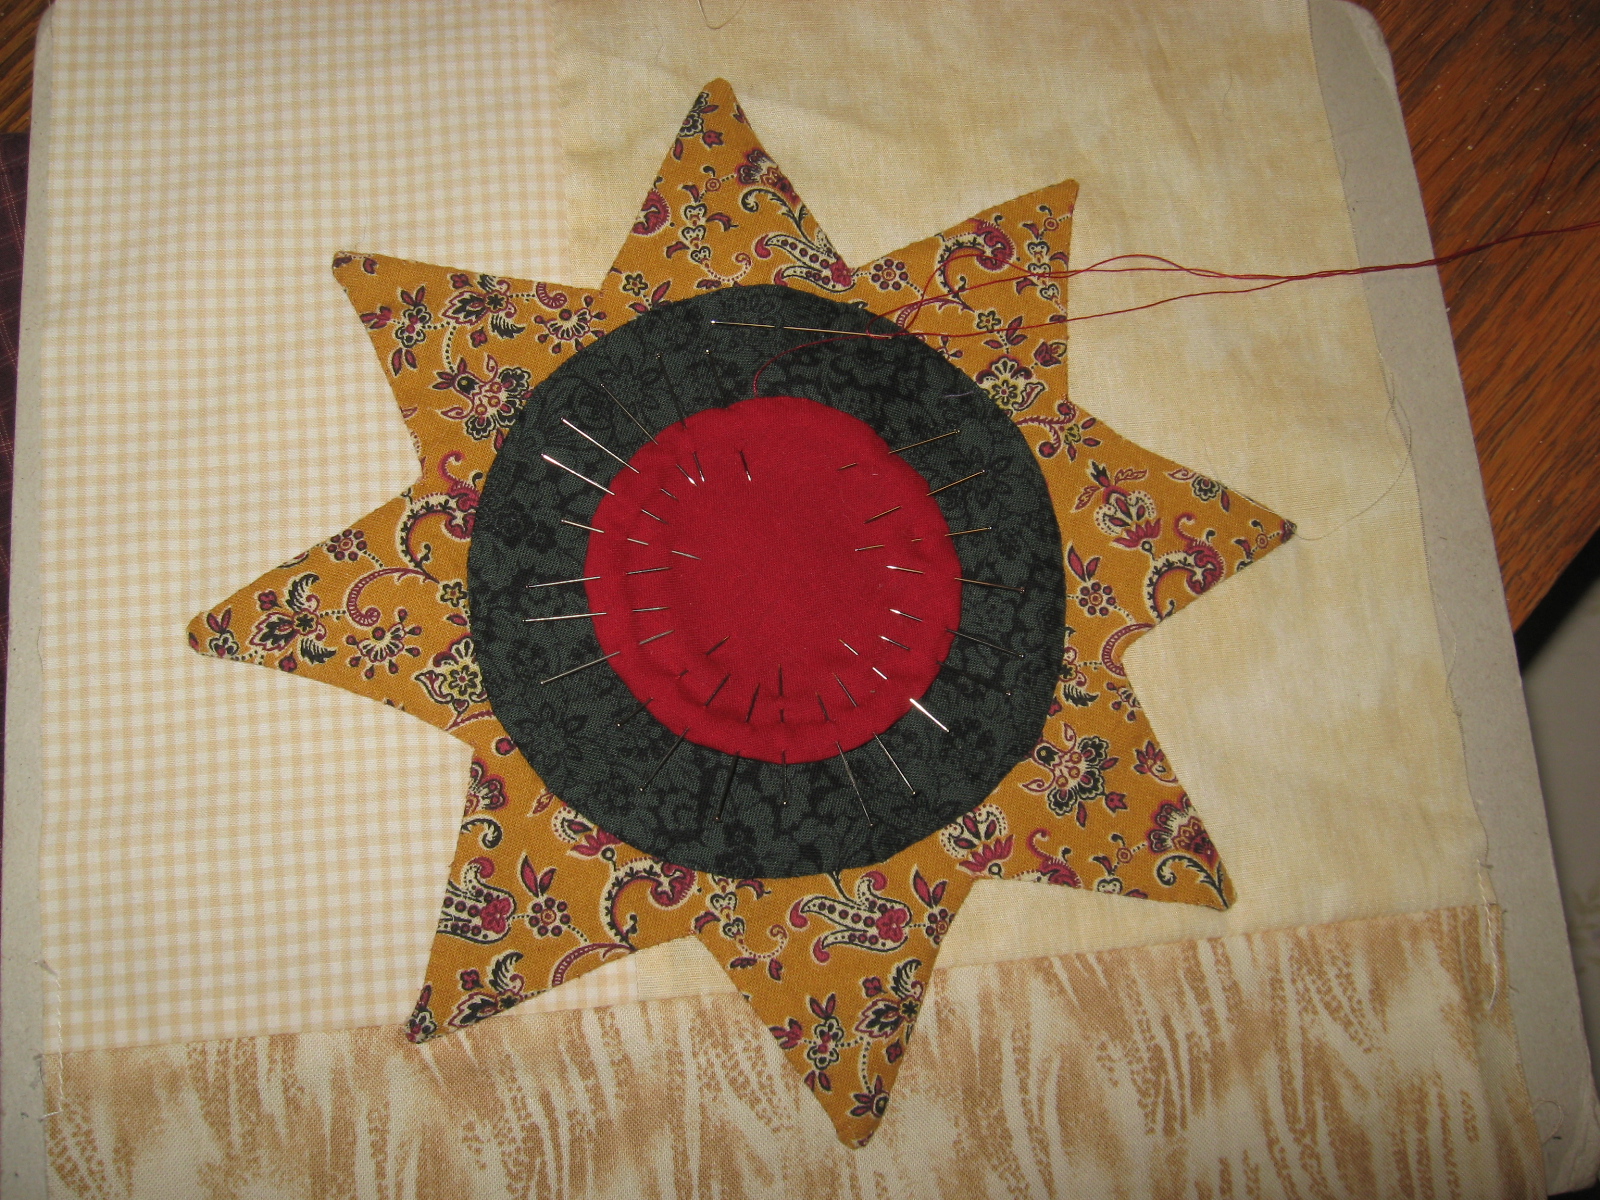
I spent part of today cutting scrappy pieced backs from behind my appliqued stars so I can add the next layers.
Now I have a stack of scrappy stars. Six more will be added when I finish cutting the last blocks.
My only stitching was reinforcing the seams where the back had been cut away. After all the time spent appliqueing I didn't want to risk the seams coming apart. Is that what people usually do if the background of an applique block is pieced? (This is my first time using backgrounds with seams.) I guess I also added extra applique stitches where I noticed the need (because now I'm carefully looking at and evaluating the backs).
I've also been cutting center circles so I'll be ready to play with color placement when the stars go back on the "design floor." I'll post photos another day.
I'm linking this post to Moving It Forward Monday at Em's Scrapbag.
I hope you're having / had a great sewing and quilting day!
--Nancy.
.
Sunday, January 17, 2016
Green Star, Scrappy Background
I'm stitching a tiny little repair on some underwear today that won't take but a minute or two. And I'm stitching the last few stars (I think) onto scrappy backgrounds. (Did I mention that I love these stars and that I love stitching them?)
This green one is partially done. I hope to finish it today. The light one, below left, is finished and the other two are next in line to be stitched.
I've never made a quilt like this before and while I'm having fun playing with the circles I'm not sure how to resolve the color placement of the circles. I go back and forth between choosing the circles based on the interaction of stars and colors of the whole quilt and/or based on their interaction in each individual block.
Before I began I chose colors for the stars and circles and I felt like they were compatible and looked good together. I've added a few fabrics (another blue, two reds, an orange), removed a few others (too much gold), and I still think they all work well together. However, that doesn't mean that any two fabrics touching will look fabulous side-by-side. So I continue to stitch and play. (Can you love quilt blocks too much?)
Have you made quilts with multiple layers in multiple colors? How did you choose the colors of the layers? Did you choose before you ever cut or stitched? Did you choose intuitively as the work progressed? Or after the first layer was stitched on all the blocks? Were you concerned about the interplay of colors across the whole quilt, or within one block, or both?
I'm linking this post to
Slow Sunday Stitching at Kathy's Quilts and
Oh Scrap! at Quilting is more fun than Housework.
Thanks for hosting, ladies.
I hope you're having a calm, peaceful, rejuvenating Sunday.
--Nancy.
.
Wednesday, January 13, 2016
Playing and My Mind's Eye
Is anyone tired of seeing photos of this quilt? It's really captured my attention, so much so that I don't want to work on anything else.
I'm having lots of fun cutting and layering circles on the stars. Once circle, two circles, or three circles? A large circle that fills the center of the star or a smaller circle? Which colors/fabrics to layer together? Which colors to omit, which ones to add? The gold/yellow/orange tones seemed to be taking over so I removed some of the circles, but maybe they would be perfect behind another circle. Just more play coming my way.
I have several more scrappy backgrounds to make and stars to cut and stitch. Of course, it may be that not every one of them will appear in the finished quilt.
Do you ever see things in your mind's eye? I do, but I think my mind's eye needs corrective lenses. I imagine a quilt, go to work on it, and then realize that I really didn't see the finished quilt as clearly as I thought. I suppose that's not uncommon or quilters wouldn't have design walls (or floors), would they? Of course, if I really saw the finished quilt I'd bypass the play part of quilting and miss the fun!
I'm linking this post to
WOW at Esther's Blog,
WIP Wednesday at Freshly Pieced,
Needle and Thread Thursday at My Quilt Infatuation, and
Let's Bee Social #107 at Sew Fresh Quilts.
Thanks for hosting the link-ups, ladies.
Wishing you joy this cold (Ohio) winter day.
--Nancy.
.
Subscribe to:
Posts (Atom)


