My supplies to mark this quilt were cardboard circle templates and Prismacolor pencils. I tried three different colors that were slightly contrasting to the fabrics in the quilt but dark enough that I could see the color.
I didn't know if the marks would wash out so I wanted a color that I could live with if they didn't.
You can see in the photos below how the marks looked on the fabrics. (Click the photos to enlarge them. They'll open in a new window and you'll be able to click again to see them even larger.)
The marks were harder to see after I'd quilted over them. I wondered if they would wash out. I could live with the quilt if they didn't but I hoped they would come out.
After the first wash and dry there were only the slightest traces of colored pencil on a few of the blocks. I wasn't worried about them because they didn't stand out or distract from the quilt as a whole. By the second wash and dry there was no trace of colored pencil on any of the blocks.
I don't know the content of the colored leads in the pencils and it's possible that they contain acid or something else that would damage the fabric over time. Should this quilt last for a hundred years, it's possible the lead would eat through the fabric and make holes, but I doubt that would happen. Of course, I can't imagine this quilt being around that long anyway.
When I hand quilt I usually use masking tape to mark straight lines, use
a seam as a guide, or do free-hand Baptist Fans. I used a lead pencil
once and now Prismacolor pencils. In one of Gwen Marston's books she recommended Berol Verithin
white or silver pencils, Berol Karisma pencils, and graphite Aquarelle
pencils. Not having access to any of those, I tried
Prismacolor.
Though the Prismicolor pencils do not make a fine line and needed frequent sharpening, I liked using them. It wasn't too hard to mark on the quilt and I was pleased that the color washed out. I would use the them again. One thing I would not do is use a pencil in a color that is a high contrast to the fabric in the quilt -- never black on a white quilt -- even though it would probably wash out.
Have you ever used colored pencils on a quilt or do you have some favorite way to mark a quilt?
--Nancy.
.
Showing posts with label scrappy leftovers. Show all posts
Tuesday, August 27, 2019
Monday, September 17, 2018
Scrappy Leftovers in Blogger's Quilt Festival Fall 2018
It's Festival Time again! The wonderful Amy Ellis is hosting Blogger's Quilt Festival :: Fall 2018 Edition at her website, Amy's Creative Side. If you've finished a quilt or two this year and have a blog, you're invited to participate. You can post all week. It's a great way to share your quilts and see others' quilts you might have missed.
"Scrappy Leftovers" is participating in the Festival this year. How I wish my photos did justice to this quilt. No light seems quite right. Indoors with a flash the colors look just a tad warmer than they really are.
Outdoors the colors wash to white or grey.
You'll have to trust me that its true colors are lights, naturals, warms, and creams with hints of coral/peach/pink and just a few scraps of light yellow and a few whites/off-whites here and there.
This quilt began as scraps cut from behind applique pieces on another quilt. The pieces were too large to throw away but the largest measured only 4". There weren't enough by themselves to make a quilt but I had lots of small, light/neutral scraps to sew together. (But not quite enough. Thanks to Susan from DesertSky Quilting who sent some to help me finish.)
For a while they became my leaders and enders and sometimes my purposeful sewing, leading and ending each other until I had a nice stack. I put them together into blocks with coral/peach sashing and red centers. Once sewn together I added the circles where four blocks met, but only in alternate squares.
The top measured 61½" x 77½". The back is scrappy but with only several large pieces of fabric. The batting is Soft 'n' Crafty 80/20 (cotton/poly).
As much as I loved the top I wasn't sure how I could hand quilt through all the seams. Some 4" blocks have as many 10 pieces of fabric. One of my readers, Martha of Q is for Quilt, suggested circles and sent a diagram of her idea which I adapted and altered, then created my own templates. (I used Prismacolor pencils to mark the circles. I'll post about that a little later.)
I knew I lacked the skill to make fine, small stitches but I also knew I didn't want do "big stitch" quilting with embroidery floss or pearl cotton. I finally chose Americana brand quilt thread in a color called buttercream, which was a delight to use, and managed about five stitches/inch. Big stitch with quilting thread, I guess. The seams were a challenge.
After quilting it measured 61" X 76". After washing and drying it measures 58¼" x 72". I was surprised at how crinkly and puckered it became. It's easy to imagine how the air caught between the layers will add warmth to someone sleeping under the quilt. In the photo above you can see the crinkles and also the quilted circles and lines that connect them, creating a diamond box around the red cornerstone. I used masking tape as a guide for the straight lines.
Out in the sunshine.
And on the floor inside ... because I'm not ready to fold it and put it away yet. It is just such an inviting quilt.
I loved the process of creating this quilt, from sewing scraps to sewing binding. And I love the finished quilt, perhaps more than any other I've made. My only regrets are that it's not larger and that I wasn't able to/didn't try to take smaller stitches. Even so, I love it.
Remember to visit Blogger's Quilt Festival :: Fall 2018 Edition to see lots of other quilts. And if you'd like to participate with one or two of your own quilts, write a post and link it. Thank you for hosting this wonderful event, Amy!
--Nancy.
.
"Scrappy Leftovers" is participating in the Festival this year. How I wish my photos did justice to this quilt. No light seems quite right. Indoors with a flash the colors look just a tad warmer than they really are.
Outdoors the colors wash to white or grey.
You'll have to trust me that its true colors are lights, naturals, warms, and creams with hints of coral/peach/pink and just a few scraps of light yellow and a few whites/off-whites here and there.
This quilt began as scraps cut from behind applique pieces on another quilt. The pieces were too large to throw away but the largest measured only 4". There weren't enough by themselves to make a quilt but I had lots of small, light/neutral scraps to sew together. (But not quite enough. Thanks to Susan from DesertSky Quilting who sent some to help me finish.)
For a while they became my leaders and enders and sometimes my purposeful sewing, leading and ending each other until I had a nice stack. I put them together into blocks with coral/peach sashing and red centers. Once sewn together I added the circles where four blocks met, but only in alternate squares.
The top measured 61½" x 77½". The back is scrappy but with only several large pieces of fabric. The batting is Soft 'n' Crafty 80/20 (cotton/poly).
As much as I loved the top I wasn't sure how I could hand quilt through all the seams. Some 4" blocks have as many 10 pieces of fabric. One of my readers, Martha of Q is for Quilt, suggested circles and sent a diagram of her idea which I adapted and altered, then created my own templates. (I used Prismacolor pencils to mark the circles. I'll post about that a little later.)
I knew I lacked the skill to make fine, small stitches but I also knew I didn't want do "big stitch" quilting with embroidery floss or pearl cotton. I finally chose Americana brand quilt thread in a color called buttercream, which was a delight to use, and managed about five stitches/inch. Big stitch with quilting thread, I guess. The seams were a challenge.
After quilting it measured 61" X 76". After washing and drying it measures 58¼" x 72". I was surprised at how crinkly and puckered it became. It's easy to imagine how the air caught between the layers will add warmth to someone sleeping under the quilt. In the photo above you can see the crinkles and also the quilted circles and lines that connect them, creating a diamond box around the red cornerstone. I used masking tape as a guide for the straight lines.
Out in the sunshine.
And on the floor inside ... because I'm not ready to fold it and put it away yet. It is just such an inviting quilt.
I loved the process of creating this quilt, from sewing scraps to sewing binding. And I love the finished quilt, perhaps more than any other I've made. My only regrets are that it's not larger and that I wasn't able to/didn't try to take smaller stitches. Even so, I love it.
Remember to visit Blogger's Quilt Festival :: Fall 2018 Edition to see lots of other quilts. And if you'd like to participate with one or two of your own quilts, write a post and link it. Thank you for hosting this wonderful event, Amy!
--Nancy.
.
Monday, January 1, 2018
2017 In Review
My consolation in having so few completely finished quilts this year is that quilting was not the only interest and emphasis for me. Maybe I'll make more quilts this year, or maybe not.... So, this is a review of my 2017 applique and quilting efforts.
Completely Finished Quilts (only four)
A Blue Plaid Linen Shirt was the backing for this little patriotic quilt.
The green/blue Buckeye Beauty was The Ugliest Quilt of the year. But it's done!
My favorite quilt of 2017 was this really scrappy one, made of leftovers from another quilt.
A dozen blocks (also leftovers over from another, larger quilt) became one small quilt - large enough to cover legs, small enough to wrap a baby or toddler.
Interim Finishes (as in, finished blocks, finished tops, etc.)
I devoted time to choosing fabrics, pattern pieces, and appliqueing these Cheri Payne Baskets of Plenty sew-along blocks which are currently awaiting a decision on layout, sashing, and borders. (Poor, late-night phone photo. Don't bother to enlarge.)
My Gwenny-inspired Medallion quilt top received its final border with appliqued vines and stars. It has yet to be layered and quilted.
This very red/pink Buckeye Beauty is finished to the top stage. This is a sister to the ugliest quilt, above. I like this one much better.
Most Viewed Posts in reverse order, least viewed to most viewed
> A Finish, Compared to...
> Baskets of Plenty #7: Cheeky Bird
> Baskets of Plenty Block 2, Choosing for Block 3
> The Ugliest Quilt
> First Basket of Plenty, Finished
Posts with Most Comments in reverse order, least comments to most comments
> Albino Crow, Strong West Wind tied with When Does a Project Become a UFO?
> Back to Scrap Squares
> Wrestling
> The Ugliest Quilt
> A Scrappy Finish
Truly, this was a little year on the quilting front. Three of the complete finishes had been in progress for a while and only one was new, so I was pleased to have finished three UFOs. In 2018 I hope to quilt several tops that have been waiting and start and finish several quilts at least to the flimsy stage.
I'm linking this post to Cheryl's Best of 2017 Linky Party at Meadow Mist Designs. Click through to see other quilters' best of in 2017. Thanks for hosting, Cheryl.
I wish you all the best to you in 2018!
--Nancy.
Completely Finished Quilts (only four)
A Blue Plaid Linen Shirt was the backing for this little patriotic quilt.
The green/blue Buckeye Beauty was The Ugliest Quilt of the year. But it's done!
My favorite quilt of 2017 was this really scrappy one, made of leftovers from another quilt.
A dozen blocks (also leftovers over from another, larger quilt) became one small quilt - large enough to cover legs, small enough to wrap a baby or toddler.
Interim Finishes (as in, finished blocks, finished tops, etc.)
I devoted time to choosing fabrics, pattern pieces, and appliqueing these Cheri Payne Baskets of Plenty sew-along blocks which are currently awaiting a decision on layout, sashing, and borders. (Poor, late-night phone photo. Don't bother to enlarge.)
My Gwenny-inspired Medallion quilt top received its final border with appliqued vines and stars. It has yet to be layered and quilted.
This very red/pink Buckeye Beauty is finished to the top stage. This is a sister to the ugliest quilt, above. I like this one much better.
Most Viewed Posts in reverse order, least viewed to most viewed
> A Finish, Compared to...
> Baskets of Plenty #7: Cheeky Bird
> Baskets of Plenty Block 2, Choosing for Block 3
> The Ugliest Quilt
> First Basket of Plenty, Finished
Posts with Most Comments in reverse order, least comments to most comments
> Albino Crow, Strong West Wind tied with When Does a Project Become a UFO?
> Back to Scrap Squares
> Wrestling
> The Ugliest Quilt
> A Scrappy Finish
Truly, this was a little year on the quilting front. Three of the complete finishes had been in progress for a while and only one was new, so I was pleased to have finished three UFOs. In 2018 I hope to quilt several tops that have been waiting and start and finish several quilts at least to the flimsy stage.
I'm linking this post to Cheryl's Best of 2017 Linky Party at Meadow Mist Designs. Click through to see other quilters' best of in 2017. Thanks for hosting, Cheryl.I wish you all the best to you in 2018!
--Nancy.
Friday, November 10, 2017
A Scrappy Finish
How I wish my photos did justice to this quilt. No light seems quite right. Indoors with a flash the colors look just a tad warmer than they really are.
Outdoors the colors wash to white or grey.
You'll have to trust me that its true colors are lights, naturals, warms, and creams with hints of coral/peach/pink and just a few scraps of light yellow and a few whites/off-whites here and there.
This quilt began as scraps cut from behind applique pieces on another quilt. The pieces were too large to throw away but the largest measured only 4". There weren't enough by themselves to make a quilt but I had lots of small, light/neutral scraps to sew together. (But not quite enough. Susan from DesertSky Quilting sent some to help me finish.)
For a while they became my leaders and enders and sometimes my purposeful sewing, leading and ending each other until I had a nice stack. I put them together into blocks with coral/peach sashing and red centers. Once sewn together I added the circles where four blocks met, but only in alternate squares.
The top measured 61½" x 77½". The back is scrappy but with only several large pieces of fabric. The batting is Soft 'n' Crafty 80/20 (cotton/poly).
As much as I loved the top I wasn't sure how I could hand quilt through all the seams. Some 4" blocks have as many 10 pieces of fabric. One of my readers, Martha of Q is for Quilt, suggested circles and sent a diagram of her idea which I adapted and altered, then created my own templates. (I used Prismacolor pencils to mark the circles. I'll post about that a little later.)
I knew I lacked the skill to make fine, small stitches but I also knew I didn't want do "big stitch" quilting with embroidery floss or pearl cotton. I finally chose Americana brand quilt thread in a color called buttercream, which was a delight to use, and managed about five stitches/inch. Big stitch with quilting thread, I guess. The seams were a challenge.
After quilting it measured 61" X 76". After washing and drying it measured 58¼" x 72". I was surprised at how crinkly and puckered it became. It's easy to imagine how the air caught between the layers will add warmth to someone sleeping under the quilt. In the photo above you can see the crinkles and also the quilted circles and lines that connect them, creating a diamond box around the red cornerstone. I used masking tape as a guide for the straight lines.
Out in the sunshine.
And on the floor inside ... because I'm not ready to fold it and put it away yet. It is just such an inviting quilt.
I loved the process of creating this quilt, from sewing scraps to sewing binding. And I love the finished quilt, perhaps more than any other I've made. My only regrets are that it's not larger and that I wasn't able to/didn't try to take smaller stitches. Even so, I love it.
I'm linking this post to
> finish it up Friday at crazy mom quilts
> Finished or Not Friday at Busy Hands Quilts
> Can I get a Whoop Whoop? at Confessions of a Fabric Addict
> TGIFF at Celtic Thistle Stitches
> ScrapHappy at Tall Tales from Chiconia
I'm also linking this post to One Monthly Goal - November Finish Link-up at Elm Street Quilts. Finishing the binding on this quilt was my goal for November.
Thanks for hosting, ladies.
--Nancy.
.
Tuesday, October 31, 2017
Preparing a Binding + One Monthly Goal
Today I cut binding strips for this quilt (which still doesn't have a name). It's one of those quilts that doesn't photograph very well. It's creamier than in the photo.
My One Monthly Goal for November is to get this quilt bound, washed, dried, and finished. It shouldn't take a month to sew binding strips, sew the binding around the quilt, then stitch it in place but November is shaping up to be a busy month. And the binding on this quilt isn't the only stitching I hope to do this month.
I finally figured out an easy way to align the edges to make seams on binding strips. I've tried several different ways but I like this one best.
I laid the strips of fabric along the lines of my cutting mat so the ends went at least 1/4" beyond the 45-degree diagonal line.
Then I carefully put the 1/4" mark of my acrylic ruler on the 45-degree line on the mat...
... and cut with my rotary cutter. I carefully removed the ruler...
...and pinned the ends together.
It worked like a charm. I cut and pinned until I had the whole binding ready, then took the length of fabric to the machine to sew. This was a quick and easy way to make sure the pieces were lined up for a 1/4" seam. If you decide to try this method and you're using plain fabric be sure all the seams are on the same side of the fabric. I had to unstitch two because they were on the wrong side. You'll not have a problem with printed fabric.
How do you stitch binding strips together? Maybe you have an even easier way to do it?
I'm linking this post to
> Moving It Forward Monday at Em's Scrapbag
> Monday Making at Love Laugh Quilt
> One Monthly Goal at Elm Street Quilts
Thanks for hosting, ladies.
--Nancy.
.
Monday, October 9, 2017
Stitch by Stitch - Slow Sunday Stitching
Having finished quilting the circles (except the ones that are appliqued in the center of some blocks) I've moved on to quilting the connecting lines between the circles on this scrappy quilt.
I haven't been hurrying to finish this quilt but sometimes hand quilting seems to take forever. I also have not been working too hard to make tiny stitches. Utility stitches for a utility quilt seems about right.
The color's a little too creamy in this photo. It was grey and rainy today and I snapped this photo under the light of an Ikea lamp, which doesn't capture the true, natural colors.
I will be happy to finish this quilt, not because I'm tired of it, but because it means I will be able to use it!
I'm linking this post to Slow Sunday Stitching at Kathy's Quilts. Thanks for hosting, Kathy.
--Nancy.
.
Sunday, September 17, 2017
Sixteen Down
I have 16 half-circle blocks around the edges of this quilt finished and 16 half-circle blocks plus four corner quarter circles to quilt. I guess that means I'm nearly half done with the edge circles.
It would be great if that finished the quilting but I need to go back and quilt the corners of each block. I envision quilting several diagonal lines from circle to circle across the corners. I should probably decide exactly how to quilt before I begin, shouldn't I? But I think what I've got going will work for this quilt.
You can just barely see the Prismacolor pencil marks outlining the circles to be quilting. I've had to remark several of them either because they were too light or because they rubbed off.
I'm linking this post to Slow Sunday Stitching at Kathy's Quilts. Thanks for hosting, Kathy.
--Nancy.
.
Sunday, August 6, 2017
Circles for Slow Sunday Stitching
This is my current quilt in the hoop and if I have a chance to do any handwork today it will get some stitches. I'm linking this post to Slow Sunday Stitching at Kathy's Quilts. Thank you, Kathy, for giving us slow stitchers a place to share.
You may notice that the circle closest to the applique circle is off-center. I'll remove that it, remark, and quilt it again. I spent nearly a whole day marking the circles and obviously missed the mark at least once!
I marked with Prismacolor colored pencils in tints close to those of the sashing and center circle. If the marks don't wash out I'll call them a design element which enhances the quilted circles. Ha! I didn't want the marks to be too dark, but not too light, either. Some have already worn away just while handling the quilt. Maybe they will all be gone by the time I finish quilting. Those that are still there I hope will wash out. After the quilt is finished I'll do a follow-up post about the results of using Prismacolor pencils to mark quilts.
I'm enjoying using regular quilting thread again. It's so easy!
And I'm hoping for a restful hour or two of hand quilting. While I quilt I'll listen to this talk again. It is one of my favorite about grace.
Happy Sabbath to you.
--Nancy.
.
You may notice that the circle closest to the applique circle is off-center. I'll remove that it, remark, and quilt it again. I spent nearly a whole day marking the circles and obviously missed the mark at least once!
I marked with Prismacolor colored pencils in tints close to those of the sashing and center circle. If the marks don't wash out I'll call them a design element which enhances the quilted circles. Ha! I didn't want the marks to be too dark, but not too light, either. Some have already worn away just while handling the quilt. Maybe they will all be gone by the time I finish quilting. Those that are still there I hope will wash out. After the quilt is finished I'll do a follow-up post about the results of using Prismacolor pencils to mark quilts.
I'm enjoying using regular quilting thread again. It's so easy!
And I'm hoping for a restful hour or two of hand quilting. While I quilt I'll listen to this talk again. It is one of my favorite about grace.
Happy Sabbath to you.
--Nancy.
.
Friday, July 28, 2017
Nearly No Quilting
Dear readers, thank you for your comments on my last post. My daughters, grandchildren, and daughter's kittens have been visiting for the past week so my attention has been focused on them instead of creative activities. I will respond to your comments tonight or tomorrow.
The little quilting I accomplished was stitching around 32 circles. I was certain I wanted the circles "outlined" but now I'm not sure how to quilt the rest of the blocks.
Concentric circles in the squares with circles? But what about the plain blocks? Or diagonal quilting through all the blocks? Quilting along either side of and lengthwise through the sashing? Through the center of each piece of fabric? Or....? I love Baptist Fans but there are just so many seams. I used to think the quilting just held the layers together but now I realize how much it can change the character of a quit. I want to choose a quilting pattern (or non-pattern) that will enhance this quilt. I just don't know what it is.
I'm quilting with Americana thread, making larger than usual stitches (those seams!) but not "big stitch" stitches. The thread was on sale at JoAnn for either $1.00 per spool or two spools for $1.00. I can't remember which.
I like it a lot, especially compared to quilting with three strands of embroidery floss. It pulls through so easily and doesn't knot. Perhaps it's not the best quality thread but it was available.
These are the kittens we've been tending: Lady Jane Grey and Jack Black. Our daughter brought them for a visit early in the month and, because she had to go home to work seven 12-hour days in a row, asked if they could stay so they'd have company and human interaction. I like cats but don't love cats the way some people do but I couldn't say no. They are cute.
They weren't much trouble because they spent their nights and some of each day in our breezeway, though it was a surprise to go out one morning to greet them and find one on top of our 36" grapevine wreath and one nestled into its lower curve. And I believe they may have tested the patience of our Airedale, Hannah. They went home with our daughter yesterday.
The ages of our grands are 5, 3½, and 1½. How fun to see their shoes all lined up after a bath.
All seven of us went to our state fair on Wednesday. The weather was great -- no rain, low humidity, and not too hot. I had forgotten how different and fun it is to go to a fair with children. They're interested in almost everything and want to ask questions, see what's going on, and participate if there's an opportunity.
This is our little 3½-year-old granddaughter. Before the fair I found a little pioneer-style bonnet at the thrift store. To that she added the free sunglasses and a cooling cloth draped around her shoulders. She reminded me of a little grandmother. And I was thrilled to see that vanity has not yet taken hold. No worries about appearance for her!
We've had days of rain -- leaden skies, drenched-to-the-bone, need-a-light-on-at-mid-morning rain. It's beautiful -- I love rainy days -- but they make it hard to choose colors and fabrics for quilts and blocks.
Of course the rain helps the flowers and other plants. We saw this beautiful garden of zinnias in bloom in front of a home near the farmer's market. I'm not a gardener but if I were I'd plant zinnias.
Now that our daughters and grands are gone and I have time to quilt, I hope I can quickly decide how to quilt the empty space around the circles in the quilt at the top of this post!
I'm linking this post to Finished or Not Friday at Busy Hands Quilts. Thanks for hosting, Myra.
--Nancy.
The little quilting I accomplished was stitching around 32 circles. I was certain I wanted the circles "outlined" but now I'm not sure how to quilt the rest of the blocks.
Concentric circles in the squares with circles? But what about the plain blocks? Or diagonal quilting through all the blocks? Quilting along either side of and lengthwise through the sashing? Through the center of each piece of fabric? Or....? I love Baptist Fans but there are just so many seams. I used to think the quilting just held the layers together but now I realize how much it can change the character of a quit. I want to choose a quilting pattern (or non-pattern) that will enhance this quilt. I just don't know what it is.
I'm quilting with Americana thread, making larger than usual stitches (those seams!) but not "big stitch" stitches. The thread was on sale at JoAnn for either $1.00 per spool or two spools for $1.00. I can't remember which.
I like it a lot, especially compared to quilting with three strands of embroidery floss. It pulls through so easily and doesn't knot. Perhaps it's not the best quality thread but it was available.
These are the kittens we've been tending: Lady Jane Grey and Jack Black. Our daughter brought them for a visit early in the month and, because she had to go home to work seven 12-hour days in a row, asked if they could stay so they'd have company and human interaction. I like cats but don't love cats the way some people do but I couldn't say no. They are cute.
They weren't much trouble because they spent their nights and some of each day in our breezeway, though it was a surprise to go out one morning to greet them and find one on top of our 36" grapevine wreath and one nestled into its lower curve. And I believe they may have tested the patience of our Airedale, Hannah. They went home with our daughter yesterday.
The ages of our grands are 5, 3½, and 1½. How fun to see their shoes all lined up after a bath.
All seven of us went to our state fair on Wednesday. The weather was great -- no rain, low humidity, and not too hot. I had forgotten how different and fun it is to go to a fair with children. They're interested in almost everything and want to ask questions, see what's going on, and participate if there's an opportunity.This is our little 3½-year-old granddaughter. Before the fair I found a little pioneer-style bonnet at the thrift store. To that she added the free sunglasses and a cooling cloth draped around her shoulders. She reminded me of a little grandmother. And I was thrilled to see that vanity has not yet taken hold. No worries about appearance for her!
We've had days of rain -- leaden skies, drenched-to-the-bone, need-a-light-on-at-mid-morning rain. It's beautiful -- I love rainy days -- but they make it hard to choose colors and fabrics for quilts and blocks.
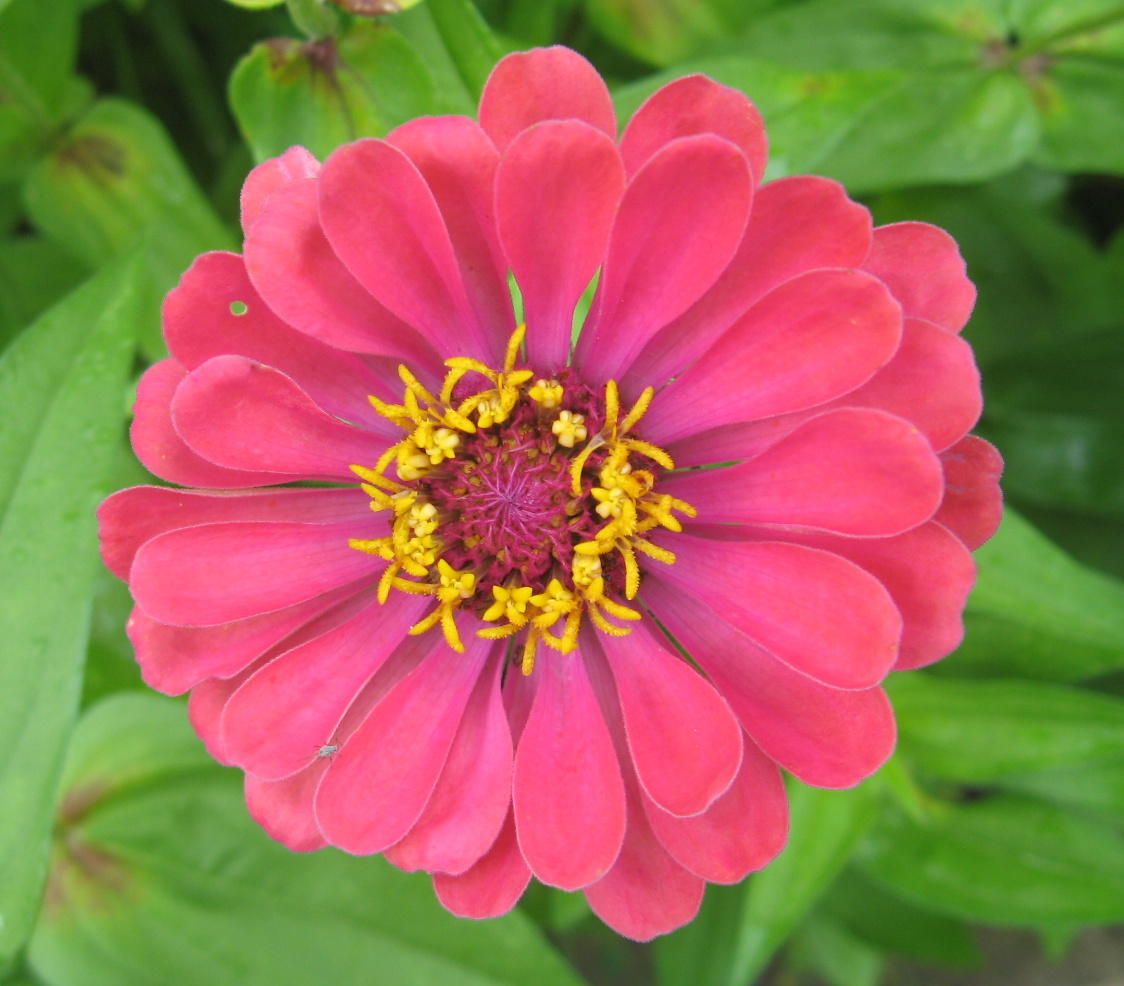
Of course the rain helps the flowers and other plants. We saw this beautiful garden of zinnias in bloom in front of a home near the farmer's market. I'm not a gardener but if I were I'd plant zinnias.
Now that our daughters and grands are gone and I have time to quilt, I hope I can quickly decide how to quilt the empty space around the circles in the quilt at the top of this post!
I'm linking this post to Finished or Not Friday at Busy Hands Quilts. Thanks for hosting, Myra.
--Nancy.
Subscribe to:
Posts (Atom)


